")
How To Remove Haze From An Acrylic Aquarium
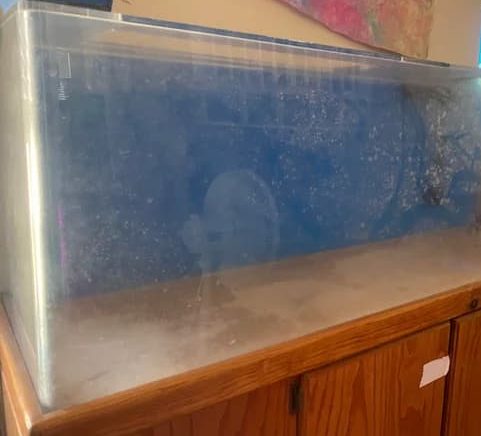
Acrylic fish tanks are a great budget-friendly option for aquarists. While acrylic fish tanks tend to be fairly durable, you’ll ultimately have to contend with superficial problems like haze.
While acrylic that has haze on the pane won’t cause the tank issues when it comes to the tank’s integrity, it can seriously limit your viewing experience. Thankfully, there are ways to remove haze from acrylic fish tanks.
Empty The Tank
Before focusing on getting rid of the unsightly haze from your acrylic aquarium, you’ll first need to empty the tank. Once everything has been removed from the fish tank, you’ll get rid of the tank water. Simply lowering the water level enough to access the haze isn’t recommended. Tackling haze will create tiny debris particles that will fall into the rest of the tank’s water, so it’s always best to work with a completely empty tank.
Using Sandpaper To Remove Haze
Once your tank has been drained and emptied, you can finally tackle the unsightly haze. Because haze can be stubborn, sandpaper is a good option to use. You’ll want to have sandpaper that can cope with some exposure to moisture, so forget about using basic sandpaper and use one that can be used in wet and dry conditions.
When using sandpaper on the acrylic tank, you should avoid a circular sanding motion. While you may think this would result produce a good result, the opposite is true. If you apply pressure with sandpaper using a circular motion, you can find yourself left with swirled marks on the tank.
Finishing Up
Once you’ve finished getting the haze out with sandpaper, you should take the time to thoroughly clean the interior of the fish tank. The use of sandpaper on the walls of the tank can create minuscule acrylic particles to accumulate on the interior of your fish tank. Going over the area with water should get rid of most of these particles.
You can also consider using a heavily diluted detergent. Once the interior of your tank has been cleaned, go over the tank with a lint-free cloth to dry the acrylic before returning the tank ornaments and refilling with water.
Keeping Your Acrylic Tank Clean
When cleaning an acrylic tank, you should follow the standard procedure of cleaning a tank. Keeping an acrylic tank clean includes cleaning the gravel, decorations, and tank walls and removing fish waste.
To clean an acrylic fish tank, you will need:
- Water
- Plastic polish
- Soft cloth
- Use Water and Cloth
When cleaning an acrylic fish tank, you need to use less force than you would if you were cleaning a glass tank.
Always try to avoid products that contain chemicals, alcohol, and ammonia, and don’t use abrasive materials, as these materials can easily make the aquarium look foggy and even leave scratches.
Remember that acrylic is much more sensitive than glass; therefore, acrylic tanks cannot be cleaned in the same way as you would a glass tank.
While chemicals are often used to fight germs, they are likely to cause more damage to the surface of your tank, so it is not worth it.
Simply use a clean piece of soft cloth, and make sure it’s wet.
If you don’t want to have to constantly wet your cloth, you can also take a spray bottle and fill it with clean water so you can keep spraying the surface that you need to clean.
When wiping the panes on all sides, make sure not to miss any edges. If you miss residue, it can quickly spread over the rest of the tank. Remember not to wipe too hard, or you might just leave a scratch behind.
When cleaning the tank, turn off the tank’s filter and remove all the fish. This will help you work faster while keeping the fish safe.
The water needs to be calm to prevent any grit or sand from floating or getting between the cleaning tools and the acrylic tank because that can easily result in scratches.
Make sure there are no particles floating on the top of the tank when you’re washing the bottom of the tank.
When it comes to removing algae, cleaning it with water and a cloth won’t cut it. Using a plastic card or a plastic scraper can be more useful to remove the algae from the edges of the acrylic fish tank. Although this should be done gently to prevent your tank from getting minor scratches on the edges.
Vacuum The Gravel
A vacuum is always a safe option to clean the gravel in your acrylic tank. The best part about using a vacuum is that it’s simple.
After getting it ready, simply go over the gravel.
A tank vacuum can suck even the smallest debris that may be stuck to the gravel, which includes dirt that you might not even see.
Other than dirt, there are other items that can become stuck on the gravel or may fall between the gravel, including uneaten food, dead plants, and waste. If you don’t clean your gravel often, these things can quickly make your tank look messy.
When using the vacuum inside the tank, make sure to move your hand slowly. Moving the vacuum too fast could result in hitting the sides of your tank and scratching it.
Remember that the vacuum can also move around the gravel and knock it to the side of the tank, again potentially scratching the tank. That’s why it’s recommended to move the vacuum slowly – as long as you’re taking it slowly and carefully and the vacuum doesn’t touch the edges, your tank will be scratch-free.
Using Cleaner Magnets
A mag float cleaner is basically using two magnets which are used to clean both sides of the glass of your fish tank.
It works with one magnet inside the tank, while the other magnet is placed on the surface outside.
By simply bringing the magnets close to each other, the magnets will attract and automatically stick to one another.
This allows you to easily drag the magnets from the outside and clean the inside, too!
This is a quick and easy way to clean the acrylic panes without even touching the inside surface.
Although these cleaning magnets are great, they cannot completely replace the effect of water and a clean cloth.
They’re ideal to use for a final wipe-down after you’re done cleaning the acrylic tank.
")


")
")
